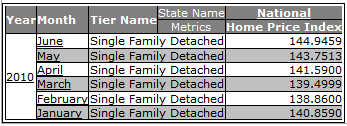
Data shown without the Attribute ID for Month
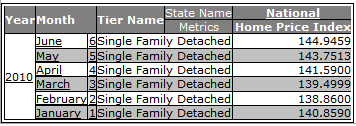
Data shown with the Attribute ID for Month


Attribute forms represent the name or reference values for attributes and an attribute may have more than one form. An attribute usually has an ID and a Description (e.g., Month is one of the best examples to illustrate attribute forms; the attribute value for June would have an ID of 6 and a Description of June). Some attributes will not have a description (e.g., Year) while others will have more than one.
Attributes may have up to two Description fields but only one ID. The ID is useful for select attributes to perform qualifying filters (e.g., to filter for months of January through June, you would define a filter on the ID for the Month attribute with a condition of >= 6 to include all months whose ID is less than or equal to 6). IDs are also useful if you wish to sort the data, using the numeric value of a Month will provide the correct chronological order as opposed to using the Description for each month.
Click here for more information on using Attribute Forms when defining a filter condition.
You may enable as many forms for an attribute as you wish. The following is an example of adding the ID and Description for the Month attribute when viewing output:
Data shown without the Attribute ID for Month |
|
Data shown with the Attribute ID for Month |
|
|
|
To enable/disable attribute forms for an attribute when working with output, right-click the attribute in the Report Editor or from the output grid and select the Attribute forms option.
In this example, the Month attribute has been selected and the attribute forms available for selection are DESC and ID. The DESC is selected for display in the output. You may enable/disable any of the forms that have been made available from the right-click menu. Please note, not all forms may appear in the right-click popup menu. If you click the More... option, the Attribute Forms dialog window is presented that allows you to make more forms available for selection.
|
|
The Attribute Forms dialog will display:
Note: For demonstration purposes, a coded attribute (Document attribute from Vector Securities) has been used for this example as they have multiple description forms. |
|